
Setting up an aquarium can be as simple or as complicated as you would like to make it. This will be an in-depth guide on how to set up a fish tank specifically for Glofish Tetras and/or Glofish Danios. This guide is primarily for beginner aquarists who are dipping their toes into the hobby or for parents who need guidance on setting up an aquarium for their children. For some quick information on GloFish check out this guide!
We will be using a 20-gallon aquarium as a point of reference for this setup guide. A fish tank this large will allow you to keep a few more fish and a larger water volume will help keep water parameters stable. Under normal circumstances, an inch of full-grown fish per gallon is the recommended ratio for keeping fish in an aquarium. GloFish Tetras and GloFish Danios max out at 2.5 inches. This will allow you to keep either 8 tetras or danios. This is great because both are schooling fish and it’s recommended to keep at least 6 to consider it a school.
Equipment Required
No matter what type of aquarium you set up, you’ll likely need at least one piece of equipment to keep it running. Once you become a pro, you are welcome to change things up and tweak the equipment to your liking. However, if you’re new to fish tank keeping, I recommend following along to learn about the equipment I recommend for your fish tank.
Aquarium Heaters
We will need a heater. The 75-watt Eheim fully submersible heater or the Fluval M100 Submersible Heater are great choices. These heaters are fully submersible so you can easily hide them behind the decor. Also, they can be calibrated to the desired temperature using the dial at the top. As with any piece of equipment, it can come faulty or become faulty over time. I highly recommend purchasing something like the Penn-Plax Therma Temp Floating Thermometer to keep an eye on the temperature in case your heater decides to fault out. If you need more heater suggestions, take a look at some of the Best Heaters for Freshwater & Saltwater Fish Tanks!
Filtration System
A good filter is always recommended. My preferred filter for a setup like this is the Aquaclear 30 Power Filter. I like this one because it has three different compartments where filter media can be added. It comes included with a sponge, carbon, and biomax. First, the sponge catches debris. The sponge will require replacement eventually but rinsing it in aquarium water during water changes will keep it going for a while.
Second, the carbon absorbs nutrients and will need to be changed once a month. Lastly, the biomax creates a bacteria haven which is important to aid in keeping a stable aquarium. These can be swapped out with other filter media but they are also perfectly fine to use for your Glofish aquarium. Unlike other filters, this one maximizes the space to assist in keeping your water clean!
Aquarium Lighting
Blue lights are what will make your Glofish pop in color. We will need a light that can be set to just blue lights to make your fish glow! Fancy lights can get expensive. Luckily there are budget lights that should do the trick for this kind of setup. The Hygger 18w Aquarium LED Light will provide you with both normal lights (to help live plants grow) and a setting to let only the blue lights shine.
If you want to go all out and splurge on a more elaborate light the Current USA Satellite Plus Pro LED Fixture is a great choice. It comes with a controller which allows you to program the lights and also use preset settings to create different effects like cloud cover and storms. Purchasing this light will also give you the ability to grow more difficult plants in your aquarium if you ever decide to go that route.
Optional Equipment
Aquarium Air Pump
An air pump is not a requirement but it adds a cool effect to the aquarium. Connecting it to compatible decorations or creating an enormous bubble wall creates a more unique aquarium experience.
Auto Feeders
Auto feeders are not usually something I recommend but they are also an option for anyone who travels and isn’t always home to feed the fish. I don’t normally recommend them because they will at times overfeed or dump most of the food at once which can create terrible spikes in phosphates and nitrates in your aquarium which can be terrible for your fish.
Decorations for GloFish Aquarium
The next thing on the list for setting up a GloFish tank is the decorations. My recommendation for a GloFish aquarium is dark gravel with little hints of coloring. Either completely black gravel or one with a little bit of color. If you plan on keeping plants, a deeper gravel bed will be needed, but otherwise, an inch-deep gravel bed should do just fine. For a 20-gallon fish tank, you’ll probably need anywhere between 10 and 20 lbs. of gravel.

Since we are putting an aquarium together specifically for GloFish having fake plants that will glow under blue lights is recommended. These plants will give the aquarium an “out of this world” feeling. Loading the aquarium with quite a few fake plants is great!
Adding some hardscape into your aquarium is important. Adding just plants won’t give structure to your fish tank. It is important to have something solid to create a nice structure and shape. Things like rocks, driftwood, sunken ships, and others are fantastic ways to bring your fish tank to life.
Other Must Have Items
There are a handful of items that I would recommend having ready to go while setting up your aquarium.
Test Kits
The API Ammonia Test Kit and API Freshwater Master Test Kit are important because your new aquarium will be going through the nitrogen cycle. The cycle goes through and once completed will provide the bacteria required to keep your fish safe. The cycle begins with a spike of ammonia. Then that converts to nitrites and lastly, the nitrites get converted to nitrates. You’ll likely know the Nitrogen Cycle is completed when you test for 0 Ammonia and Nitrites and you’ll likely see a hint of Nitrates. The nitrogen cycle normally lasts 6 weeks but the process can be sped up to about two weeks by using a bacteria starter, or media of some sort from an established aquarium.
Aquarium Water Conditioner
A water conditioner, like API’s Tap Water Conditioner, is useful to remove chlorine from the water before adding it to the aquarium. Large amounts of chlorine are bad for your aquarium’s inhabitants. API’s water conditioner is fairly straightforward. You will only need to add water conditioner to the water being added. If you change out 5 gallons of water, you only need to add water conditioner for 5 gallons worth of water. You do not need to add water conditioner for the full 20 gallons of aquarium water.
Gravel Vacuum
A gravel vacuum, like the Laifoo Aquarium Siphon, will be a must-have when water changes are conducted. The gravel vacuum is probably one of the easiest ways to remove water and clean your gravel. This one specifically is nice because it has a siphon ball which will help create a siphon. This will help you avoid getting a mouthful of water if you decide to start a siphon manually.
Net, Food, Glass Cleaner
A net and food are pretty self-explanatory. The net is to make adding the fish into the aquarium easier and the food of course is to feed the fish. Lastly, the glass cleaner will be very useful for cleaning the glass! Algae will form on the glass over time so having an aquarium-safe sponge is beneficial. I sometimes use an old gift card to clean my glass, or I treat myself by using a Melamine Sponge to clean hard-to-reach spots in the fish tank.
Setup Process
To begin, place your aquarium in its desired location. Gently begin adding gravel into the aquarium. Be sure not to drop the gravel from great heights because the glass could shatter.
Since the fish tank is empty, it’s okay to add water conditioner before or after the water is put into the fish tank. While filling the aquarium to about 30% of the water capacity begin brainstorming where to put your aquarium decorations and heater. Once 30% water capacity is reached, begin placing your decorations, and be sure to wedge your hardscape decor a little bit so it is firmly in its place.
After your decorations are in place fill your aquarium with water to about 90% capacity and place your power filter in the center back of the fish tank. Having it in the center will provide the best performance and circulation. Also, now would be the time to add the heater. Turn the dial to the desired temperature (76 – 78 degrees Fahrenheit) place it and angle it to your preference but be sure it is submerged underwater. Test out the filter and make sure it runs correctly. Once the filter begins to work continue filling the water until the fish tank is filled. Then turn on the heater and set up the light fixture.
I normally recommend allowing the aquarium to run for at least 24 hours. I do this to make sure all of the equipment is running properly and also just to make sure there are no leaks in the aquarium. I would add API Quick Start to your aquarium. This contains nitrifying bacteria that will be necessary for your new aquarium. It will hopefully speed up the nitrogen cycle and will make your aquarium safer for new arrivals.

Final Thoughts
API Quick Start should help you get through your Nitrogen Cycle quickly. I would recommend looking into the Nitrogen Cycle before beginning any sort of aquarium setup. You are working with live animals, so it is important to conduct the proper research before deciding whether to keep them in your home. Unfortunately, many people forget that.
Lastly, look into adding some snails and/or shrimp to add a clean-up crew after your Nitrogen Cycle has completed. They’re great at eating algae and uneaten food! Otherwise, I hope this guide helps with setting up a brand-new GloFish aquarium!
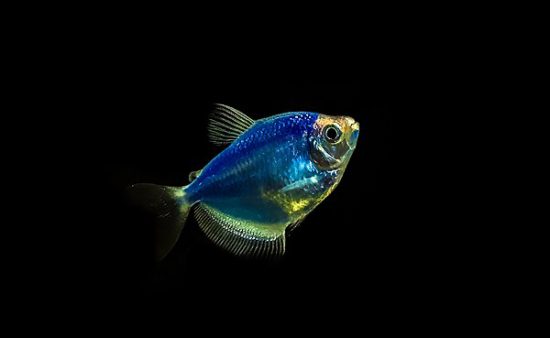
Image by Robert Kamalov on wikimedia
Pingback: 5 Unique Halloween Themed Freshwater Fish! - ATParium
Comments are closed.